In this guide we show you how to manage firewall rules for your CloudVPS-service in our client area. First you have to login to the client area to continue.
You should know in advance what services you need access to, in and out, before making any changes to the firewall rules. It is easy to block too much, which makes it difficult to troubleshoot services or functions that do not work. The firewall you control on the client area will block traffic before it reaches your CloudVPS. Depending on how you set up your CloudVPS, you may also have a firewall set up there. Our firewall does not affect this, and if you use both, you must make sure that both are kept close to changes.
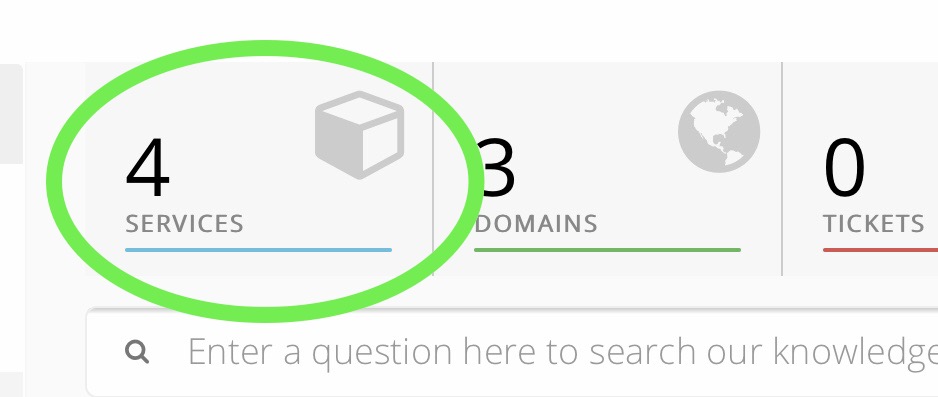
- Click on the "Services" on the client area front page once you have logged in.

- Find your CloudVPS-service in the list, and click the green active button.

- Scroll down to the section "Additional Tools" and click "Firewall".

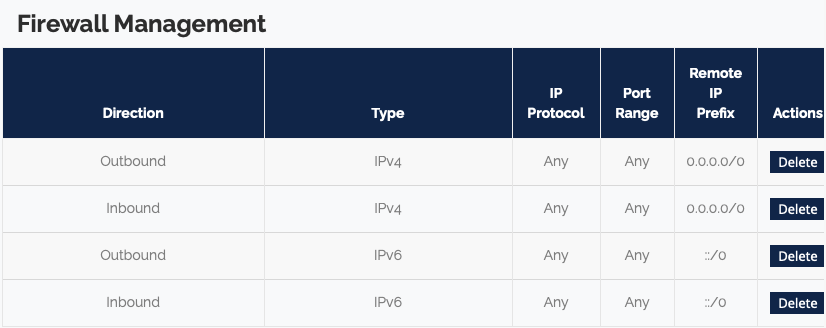
- You will see that the service has four standard rules that allow for inbound and outbound traffic for both IPv4 and IPv6 to all ports.
If you want to only allow certain types of traffic, you can delete one or more of these rules and add your own.
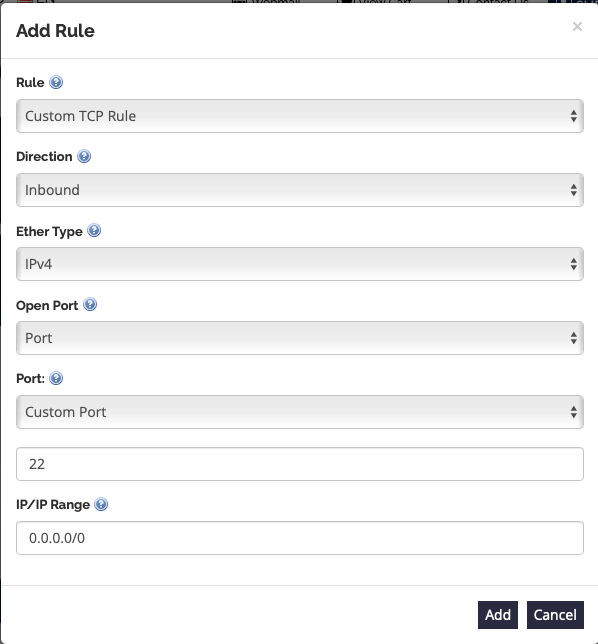
- You can add your own rules by clicking "Add rule". Below we show how to add a rule for incoming SSH connections.
Note! To block other traffic to the service, you would need to delete both IPv4 rules in the list above.
You must create the rules based on which services are to be accessed, and which protocols and ports these services use. Read the documentation for the services if you are unsure. We recommend that you always allow ICMP traffic (used by eg ping and traceroute) to simplify network troubleshooting. There are also a number of basic services that can be easy to forget to open for, e.g. DNS and NTP.
In the example above we have added one rule that allow all IPv3 adresses to connect to the service with SSH (port 22).
It is possible to limit the connection to one IP only by changing 0.0.0.0/0 to 1.2.3.4/32 (if you have the fixed IP 1.2.3.4 on your home office or office).
Click "Add" to save the new rule. - The new rule will now be shown in the list of rules. To delete the rule, simply click "Delete".

If you do have any questions or need any assistance, please contact us.