I DirectAdmin har vi installert verktøyet «IMAPSync» som gjør det enkelt å flytte innhold fra tidligere leverandør og over til konto hos Nordhost. For at dette verktøyet skal kunne benyttes kreves det at serveren hos tidligere leverandør støtter protokollen IMAP (de aller fleste servere støtter dette som standard). Vi anbefaler å lese denne guiden nøye før du starter flytting av e-post.
Før du starter må du være helt sikker på at du har korrekt informasjon fra tidligere leverandør (server, brukernavn og passord). Du må og ha opprettet e-postkontoen på webhotellet hos oss. Test gjerne at den nye kontoen hos oss fungerer ved å logge inn på vår webmail.
Dersom navneserverne ikke er hos oss, men skal byttes til våre, anbefaler vi at endringen av navneserverne utføres etter at e-post og hjemmeside er flyttet over. Når alle tjenester er aktiv fra vår server kan vi bistå med endring av navneserverne slik at oppsettet blir korrekt.
For å sikre levering til vår server før navneserverne endres anbefaler vi at du legger til IPen for ditt domenenavn/server hos oss i SPF oppføringen hos nåværende leverandør (kontakt leverandøren for hjelp/brukerstøtte).
- For å finne IPen til ditt domenenavn hos oss må du logge deg inn på kundeweb.
- I kundeweb klikker du på "Info"-knappen bak ditt domenenavn på førstelinjen:

- På siden som kommer opp vil du finne IPen til serveren for ditt domenenavn:
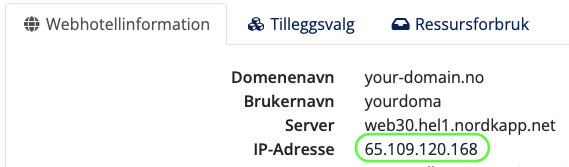
- En SPF oppføring ser normalt slik ut i DNS:
”v=spf1 a mx ip4:X.X.X.X -all”hvor X.X.X.X er IPen til nåværende leverandør. Denne må ikke slettes før flyttingen er gjennomført. IPen for ditt domenenavn må legges til medip4:65.109.120.168. Da vil oppføringen bli slik:”v=spf1 a mx ip4:X.X.X.X ip4:65.109.120.168 -all” - Når SPF er oppdatert kan flyttingen begynne som vist under.
Dersom du ønsker at vi skal utføre flyttingen for deg er vår pris kr. 390/domenenavn eks. mva. For kunder med pro100 flytter vi e-post for et domenenavn pr webhotell gratis. For å gjennomføre flyttingen må vi ha tilgang på kontrollpanel for styring av DNS og e-post hos tidligere leverandør. Vi i Nordhost bistår med gratis flytting av din hjemmeside over til vår server ved kjøp av webhotell, livslangt webhotell eller pro hosting.
- Når du har all informasjon du trenger er vi klar til å starte flyttingen. Det første som bør gjøres før import av e-post til ny konto hos oss er å endre MX-pekeren i DNS hos nåværende leverandør til å peke til vår server. Oppføringen skal se slik ut:
your-domain.no. IN MX mx.nordkapp.net.
Vent til DNS har oppdatert seg. Det kan sjekkes med verktøyet «DNS Checker»: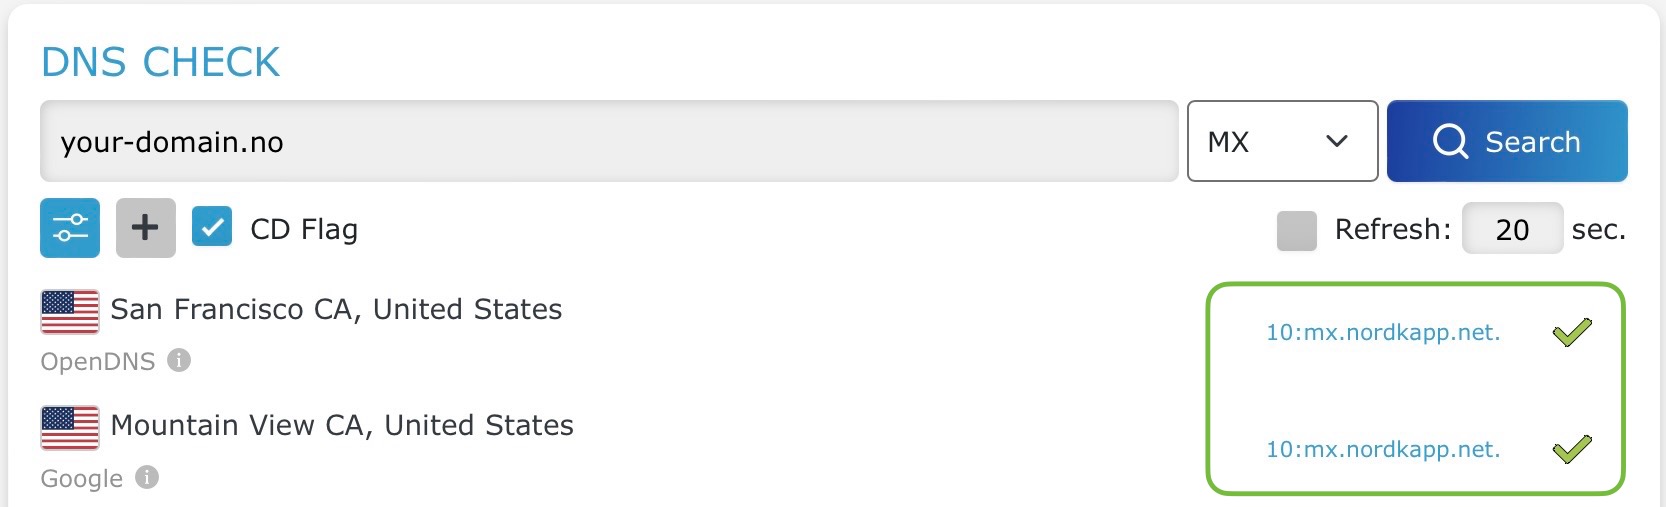
- Deretter logger du deg inn i kundeweb og klikker på knappen for DirectAdmin bak ditt domenenavn.

- I DirectAdmin velger du «E-mail Manager» og «IMAPSync Migrations» fra menyen.

- Deretter må du klikke på knappen «Import e-mails» fra menyen øverst til høyre for å starte en import.

- Skriv inn informasjon for kontoen du ønsker å flytte.
«Source» er informasjon hos din tidligere leverandør. Mange leverandører har en felles «host/vert» for e-post. Sjekk med din tidligere leverandør hva som er riktig server å benytte.
«Destination» er e-postkontoen hos oss. Her velger du kontoen («User») du vil importere til fra listen og skriver inn passordet til kontoen (som du selv valgte når e-postkontoen ble opprettet).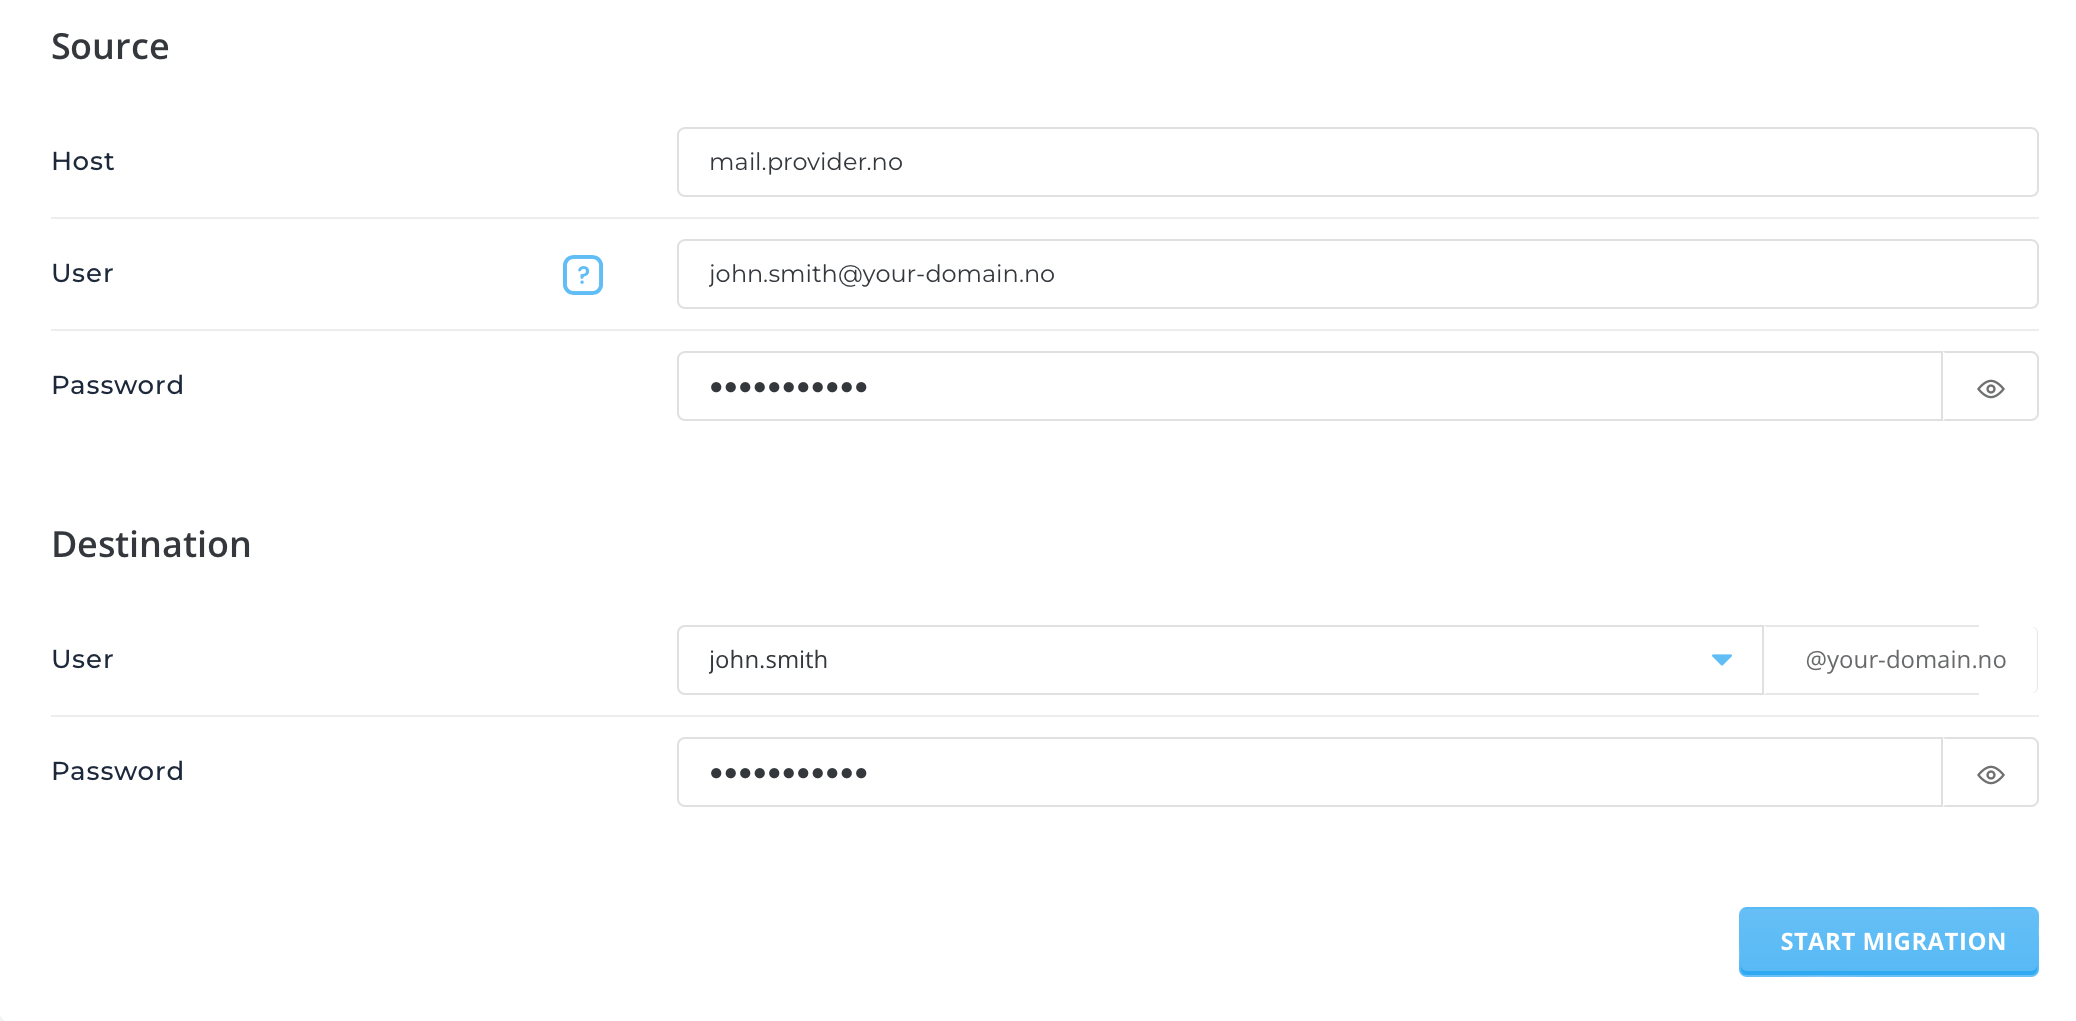
- Trykk «Start Migration»-knappen og importen av e-post til din nye konto hos oss vil starte. Dersom du har mye e-post kan det ta noe tid å fullføre flyttingen. Merk og at dersom du har oppdatert MX-pekeren vil all e-post nå bli levert til vår server. Du kan lese e-post hos oss ved å benytte en e-postklient på din enhet eller via vår webmail.
- Gjenta importen med “IMAPSync” for alle kontoene på ditt domenenavn.
Merk! Denne type migrering håndterer kun selve e-postene, og inkluderer ikke annen informasjon og data som er lagret i e-post-programmer (inkludert en webmail-løsning hos tidligere leverandør) som f.eks. kalender, kontaktliste, filter-regler og lignende. Hvis dette skal tas vare på, må det overføres på annen måte.
Ta kontakt med oss dersom du har spørsmål eller trenger hjelp.
Last Updated: 2025-08-18