This guide will show you how to create a mail forward/alias. First of all you need to login to the clientarea to proceed.
- After login to the client area find your service in the list, and click "Add/edit forward".

- To create a new forward, click the "Create forwarder" button.

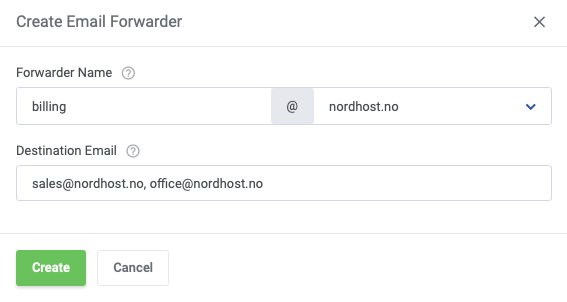
- Insert the name and destination of the forward, and click "Create".
The new forward is now setup and ready to use within a few minutes.
Note that we do not recommend to set up forwards to external domains, since spam would also be forwarded, and not filtered in a good way.
If you have any questions, please feel free to contact us!